Users can create and use their own custom images as symbols in MapInfo Pro. To access these custom symbols, place them in the CUSTSYMB directory and select them from the Custom Symbols option in the Font list of the Symbol Style dialog box (STYLE > Symbol Style).
All of the custom symbols in MapInfo Pro are stored in the CUSTSYMB directory. If this directory cannot be found, there are other places to check.
The location of this folder depends largely on the administration of your computer, the version of MapInfo Pro in use, and the location of the chosen installation directory.
For MapInfo Pro 16.0, the default directory location is:
C:\Users\user login name\AppData\Roaming\MapInfo\MapInfo\Professional\1600\CustSymb
If this directory cannot be found, use Windows Search and search for "CustSymb" on the system.
Note: If custom symbols are added while working in MapInfo Pro, open the Symbol Style dialog box and click the Reload button to ensure that the new symbol(s) that have been added display. Otherwise, close and restart MapInfo Pro to view the new symbols in the Custom Symbols list.
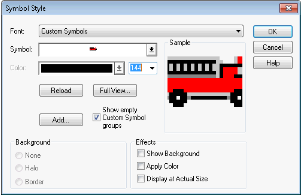
When users change the style of a custom symbol, the Effects options in the Symbol Style dialog box change.
Users can choose to show a background or apply a color.
В·Show Background displays the custom symbol with the background color with which it was created.
В·Apply Color replaces all non-white pixels with a color chosen from the color palette.
В·Display at Actual Size shows the symbol at its actual size.
When creating extended custom symbols, it is recommended that users check the Show Background check box if
transparency is not required. This setting improves performance significantly during exporting and drag and drop operations.
Understanding the Custom Symbol Types
There are two types of custom symbols: custom symbols and extended custom symbols. The difference in these two types depends upon the complexity of the bitmap images. Files that are equal to or larger than 128K and/or have greater than 8 bit color are considered to be extended custom symbols. MapInfo Pro users should know the distinction between these two types of custom symbols because the options for the extended custom symbols are slightly different from the custom symbols.
Understanding the Custom Symbol Sizes, Shape, and Color Rules
There are two types of custom symbols:
В·Custom symbols
В·Extended custom symbols
The difference in these two types depends upon the complexity of the bitmap images. Files that are equal to or larger than 128K and/or have greater than 8-bit color are considered to be extended custom symbols. Users need to know the distinction between these two types of custom symbols because the options for the extended custom symbols are slightly different for custom symbols.
Users can create various sized and shaped bitmaps for use as custom symbols. As a general rule, smaller symbols look better at smaller font sizes because they will not need to be stretched. Larger symbols look better at larger font sizes because they have more pixels and more detail.
Here are some rules and tips that govern custom symbols:
В·Users can select the point size for custom symbols from 9 to 240 pt.
В·Users can display the custom image at actual size.
В·There is no a file size limit for custom images (other than what is required by the application's raster engine and the amount of memory available).
В·Extended custom symbols can be either rectangular or square in shape.
В·Extended custom symbols usually have their own complex color pattern (which is what makes them extended) so the Apply Color option is disabled.
В·MapInfo Pro supports up to 24-bit color bitmaps.
When dealing with very large images, keep this in mind:
В·Some users have reported panning problems associated with very large symbols. When creating a symbol that is larger than 36 points, the symbol may not completely redraw as the map is panned. To alleviate this problem, go to the system registry and add or change your MBRExtraPoints registry entry.
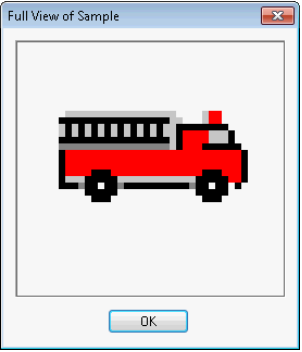
В·There are times when the custom symbol you are trying to display is too large for the sample area.
To display this image, click the Full View button to display the entire image in a new window. There may be times when the custom symbol created may be too large for even this new window.
Creating a Custom Symbol
To create a custom symbol:
1. Create a custom symbol and save it in of the supported image formats: bmp, .gif, .png, .jpg, .jp2, j2k, .pcx, .psd, .tif, .tga, .ecw
2. Place the symbol in the CustSymb directory.
3. Close and restart MapInfo Pro if it is running.
4. Open a map and make the map layer where the symbol is to be placed editable. On the HOME tab, in the Windows group, click Tool Windows, and click Layers from the list, to open the Layers window.
Users can also see map layers in the Explorer window.
Click the Editable icon beside the layer name to turn On editing.
Click the Selectable icon beside the layer name to turn On selection.
5. On the SPATIAL tab, in the Create group, on the Style list, click Symbol Style to open the Symbol Style dialog box.
6. From the Font drop-down list, choose Custom Symbols.
7. Click Reload to view the newly added custom symbol.
8. Select the desired custom symbol and click OK.
9. Click on the map using the Symbol command to display your custom symbol. On the SPATIAL tab, in the Create group, click Style, and then Symbol Style.
Adding User-Defined Custom Symbols
Users can add custom symbols to the current style collection using the Symbol Style dialog box.
To add a custom symbol:
1. On the SPATIAL tab, in the Create group, on the Style list, click Symbol Style to open the Symbol Style dialog box.
2. From the Font drop-down list, choose Custom Symbols.
3. Click Add to open the Add Custom Symbols dialog box.
Note: The Files of Type drop-down list only displays the single file formats that are supported, including *.bmp; *.gif; *.png; *.jpg; *.jp2; *.j2k; *.pcx; *.psd; *.tif; *.tga; *.ecw. The All files (*.*) option lets one add the image and support files for multi-file format images.
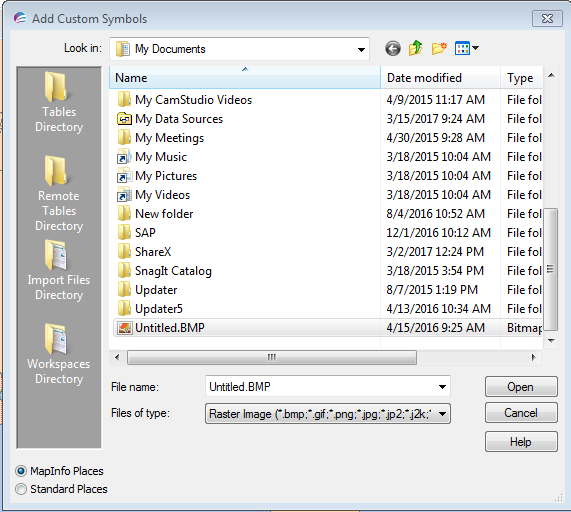
4. Go to the appropriate directory and do one of the following:
В·If adding a raster image with a single file format, navigate to the image being added.
В·If adding a raster image with a multi-file format, choose the All Files *.* option and select all of the files that are part of the image being added.
Note: It is also possible to copy raster files to the CUSTSYMB folder manually.
Click Open to open the Add Custom Symbols dialog box.
5. Click OK to confirm that the symbols were added and where they were added. They must be placed in the CUSTSYMB directory.
6. Note: If adding custom symbols to the Custom Symbols folder (CUSTSYMB) manually, click Reload to display the new symbol in the Symbol drop-down list.
В· If one or more files cannot be copied, the Results dialog box reports the failure. The copy can fail for a number of reasons, including:
В· File name must be unique. User may have attempted to overwrite an existing image file of the same name.
В· Destination file name is too long (greater than MAX_PATH, which is 254 characters for a 32-bit Windows system).
В· Destination directory does not exist
В· The security permissions on user system prevents copying due to insufficient Rights.
В· After the symbols have been copied, they are immediately available in the Symbol drop-down list.


