
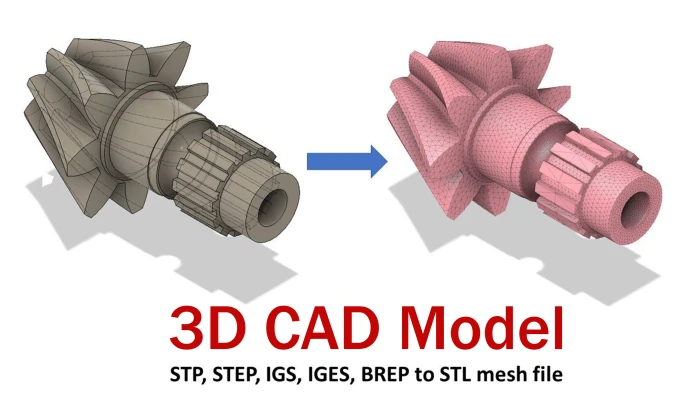
In modern manufacturing and design fields, 3D modeling and data conversion are key technological processes. Geomagic, as a powerful 3D scanning and modeling software, is widely used in fields such as reverse engineering, product design, and quality control. STL and STP file formats are particularly important in 3D printing and CAD modeling. STL is commonly used to represent 3D surface geometry, while STP (STEP) is a widely used standard format in CAD systems.
1、 How does Geomagic convert STL to STP?
Converting STL format to STP format is a common requirement in industrial design and manufacturing processes. The STL format is mainly used for 3D printing and surface scanning data, while the STP format is used for exchanging product data models. The following are the specific steps to convert STL to STP using Geomagic:
STL format
1. Import STL file: First, start the Geom agic software and import the STL file. On the main interface, select the "File" menu, then click "Import" and choose the STL file. Geomagic will load the file and display a preview of the 3D model. Users can check the integrity and quality of the model to ensure that there are no missing or damaged data.
2. Grid optimization and repair: It is recommended to optimize and repair the grid data before converting STL to STP. Geomagic provides various tools to repair holes, cracks, and noise in grids. Users can use the 'Grid Repair' tool to automatically detect and fix these issues, ensuring the accuracy and integrity of the model. The optimized grid data will help generate high-quality STP files.
3. Surface reconstruction: STL files are usually composed of triangular meshes, while STP files require geometric surface representations. In Geomagic, users can use the "Surface Reconstruction" tool to convert triangular meshes into NURBS surfaces. This process involves surface fitting and refinement to generate smooth and accurate geometric representations. Users can adjust reconstruction parameters such as surface density and smoothness as needed to achieve optimal results.
4. Create CAD model: After the surface reconstruction is completed, users can further create CAD models. This includes defining features such as holes, slots, chamfers, etc. Geomagic provides a wealth of CAD tools that enable users to accurately define and edit geometric features. These features will be saved in parameterized form in the STP file for future modification and processing.
5. Export as STP file: After creating the CAD model, select the "Export" option from the "File" menu. In the pop-up export dialog box, select STP as the file format. Users can set export options such as units, precision, and version. Click the 'Save' button, Geomagic will generate an STP file and save it to the specified location.
二、How to save STP in Geomagic
Saving STP files is an important step in converting 3D models into interchangeable data formats. The STP format not only preserves the geometric information of the model, but also contains complete product structure information and parameters. The following are the detailed steps for saving STP files in Ge omagic:
three-dimensional model
1. Prepare the model: Before saving the STP file, ensure that the model has completed all necessary edits and checks. This includes checking the integrity of the model, surface smoothness, and defining geometric features. Users can use Geomagic's view tools to inspect every part of the model, ensuring that there are no omissions or errors.
2. Export settings: In the export dialog box of Geomagic, users can set the export options for STP files. This includes selecting units (such as millimeters, centimeters, or inches), setting export precision (subdivision level), and selecting the version of the STP file (such as AP203, AP214, etc.). These settings will affect the accuracy and compatibility of STP files.
3. Save file: After completing the export settings, select the save location and enter the file name. Click the 'Save' button, Geomagic will start generating STP files. This process may take several seconds to minutes, depending on the complexity of the model and computer performance. After the generation is completed, users can find and open the STP file in the folder.
4. Verify STP file: After saving, it is recommended to use CAD software (such as SolidWorks, AutoCAD, or CATIA) to open the STP file for verification. Users can check the geometric data and feature definitions in the file to ensure that all information during the export process is correct and error free. If any issues are found, you can return to Geomagic for repair and re export.
三、Does Geomagic support exporting CAD
Geomagic not only supports the export of STP files, but also supports the export of multiple CAD formats. The following are the main CAD formats and related features supported by Geomagic:
CAD format
1. IGES: IGES (Initial Graphics Exchange Specification) is another commonly used CAD file format, widely used in various CAD systems. Geomagic supports exporting models to IGES format for easy data exchange with other CAD software. IGES files save surface and boundary representations, making them suitable for complex geometric models.
2. STEP: STEP is the standard name for STP files, which is widely used in different industrial fields as part of the international standard (ISO 10303). Geomagic supports exporting different versions of STEP files, such as AP203 and AP214. These versions are suitable for different application scenarios, such as product data management and CAD/CAM integration.
3. ParaSolid: ParaSolid is a parametric modeling kernel format widely used in high-end CAD systems such as SolidWorks and NX. Geomagic supports exporting ParaSolid files, making it suitable for applications that require parametric features and precise geometry.
4. Other formats: In addition to the above formats, Geomagic also supports other common CAD formats such as DXF, DWG, and SAT. Users can choose the appropriate format based on their specific needs for use in different software and workflows.


